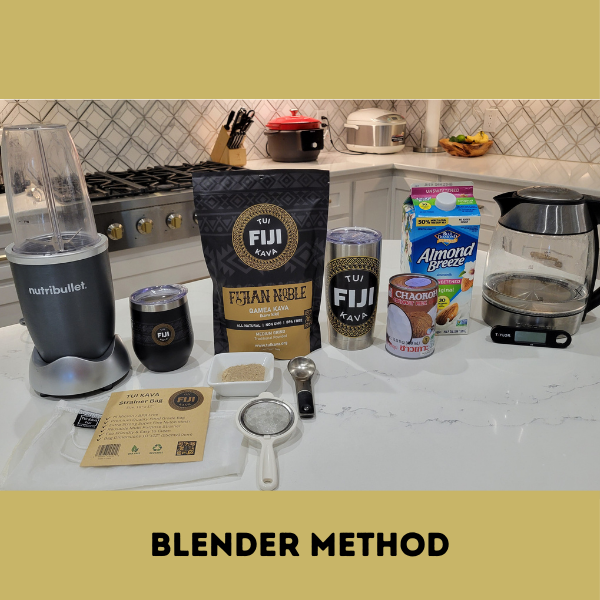
Making Kava Using a Blender
Share
Observation: I have found that this is my favorite method for making kava, it seems to release more kavalactones. I have also found that either fasting for at least 3 hours or first thing in the morning create the best effects.
You can also watch a YouTube Video here: https://youtu.be/VEphBheaF-o
Required: Blender / Straining Cloth / Bowl / Hot water / Pounded Kava
Prep Step: Measure out the amount of Kava, about 2 Tablespoons per serving for each 10oz of water.
- 1 Tbls = 5-6 grams (I usually use about 10grams)
- Slightly reduce the amount of water if you will be adding Coconut or Whole Milk.
- Kavalactones attach to the fat cells, so skim milk will not work.
- Its not an exact science, more or less kava or water. You'll find the perfect mix over time.
Step 1: Add the kava root powder, water and coconut/whole milk to the blender.
- Its good to use hottish water 110-130F to help release the kavalactones.
- I usually shoot for 130F Degrees.
- The water will increase in temp as you blend so make sure it's not overly warm when you start out.
- Let kava steep in hot water for about 3-4 minutes.
- Add a splash or about a tablespoon of your preferred milk. (coconut, almond, whole)
- Remember that warm water helps release the oils that contain the kavalactones. But water over 140 degrees will start to break down the kavalactones.
Step 2: Blend on high or pulse for 4 minutes
- This will release the kavalactones
- Optional for Cold Kava - After the initial 4 minute blend, add 1-2 Ice cubes, blend on high for 1 minute.
- I've started drinking it warm, since it gets absorbed into the body faster for a kick.
Step 3: Strain the mixture through a strainer bag if using Traditional Pounded, if you used Micronized you don't have to strain.
- Use a good 75 micron strainer bag with a draw string, place over the top of the blender, secure the bag and then pour slowly into a glass or bowl.
- You can work the Kava a little more by hand if you want, or just squeeze out the kava bag to remove any remaining elixir. By this time the kava has cooled considerably.
- TIP - DO NOT USE A COFFEE FILTER OR ANY PAPER FILTER - Kavalactones will attach to paper fibers and then you just filtered out all the goodness from the kava. Remember that you should use a 75micron filter bag if possible. In a pinch a Tshirt will work fine, but make sure it's clean. There have been many times in the islands where we only had a somewhat clean tshirt.........
Step 4: Pour into a Tumbler and enjoy. If you made one serving You should chug it. If you made a multiple batch it over a longer period of time, one serving at a time to keep topping off and extending the enjoyment
BULA!
Lets summarize the tips to make a stronger KAVA:
TIPs Summary:
- TIP - Not eating for at least 3 hours prior increases kava's effects.
- TIP - Use Warm water (120-130 degrees is best)
- TIP - Let the powder steep in the mixer with water for several minutes before blending.
- TIP - Add some whole milk/ almond or coconut milk to the drink. Kavalactones attach to fat cells and get absorbed quicker.
- TIP - Best to drink all at once, it's not a sipping drink, chug it to get the full impact.
- TIP - make sure you drink the micro sediment, that’s the most powerful part, so swish you cup around to mix it up.
- NOTE:- Your mouth will feel a bit numb after drinking, that’s goodness.
Closing Thoughts: I think this is my favorite way to make kava. It seems to enhance the impact of the kava by releasing more kavalactones. It's not as fast as the AluBall or not as relaxing as the traditional knead & squeeze method, but definitely has a lot of benefits.
Moce,
Vuniwau
